MultiSensor and TomoScope CMMsALSO SEE ABERLINK CMMSDifficult measurement applications, very small feature measurements, this is why customers chose these measuring machines. Over 10,000 installed worldwide, Werth have become the largest manufacturer of mulitsensor CMMs in Europe. The applications covered are many and varied, please enquire and tell us your requirement so that we can help. or email: mike@purduemetrology.co.uk Thank you. World leading Computed Tomography Coordinate Measuring Machines enable you to see through components even with multiple materials. Ideal for connectors, mouldings, assemblies and a growing range of other applications in many industries to produce accurate and detailed measurent reports quicker than previously possible.
View Werth MultiSensor Magazine 2019 Edition focus on CT CMMs
Multisensor CMM - ScopeCheck S (Small) ScopeCheck FB DZ (Fixed Bridge Dual Z) ScopeCheck V (Vertical, for shafts, cutting tools and gears), TomoScope CMM using CT (See through the part and accurately measure), VideoCheck (High Accuracy), Multi Sensors , simple Integrated software: Download Multisensor CMM Brochure 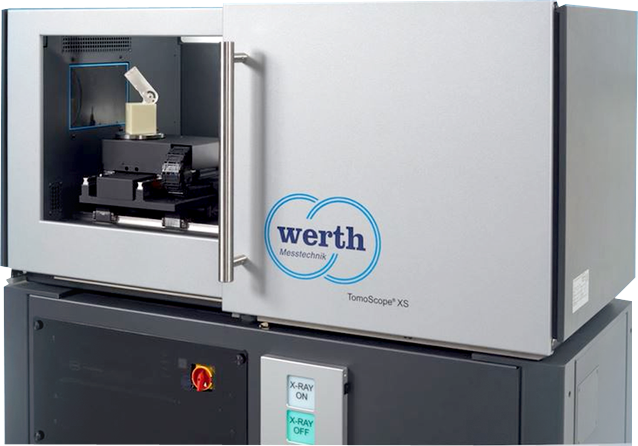 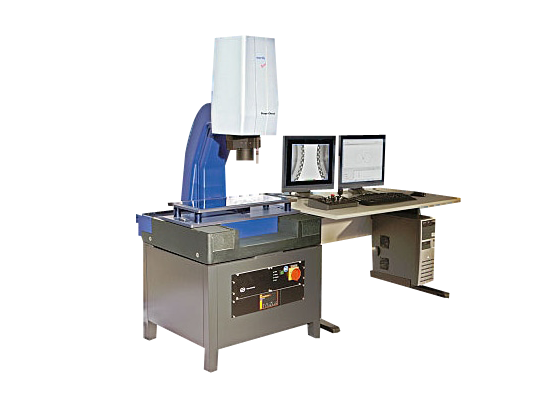 MultiSensor SC-SmallThe compact ScopeCheck S (Small) 3D coordinate measuring machine CMM with a granite base has a measurement range of 300 mm or 400 mm in the X axis and 200 mm in the Y axis allowing multisensor configurations and palletized workpieces. All Werth ScopeCheck® machines include image processing. The integration of a wide range of additional sensors and the Z measurement range of 200 mm provide flexible solutions for measuring small and medium-sized workpieces. Highlights- High performance compact multisensor CMM for use in the shop floor environment
- Heavy duty granite base for increased stability and improved accuracy
- Allows for multisensor configuration and palletised workpieces
- Contour image processing for fully automatic measurements of simple and complex geometrical elements
- High Definition Raster Scanning see Video
Machine Specs- Measuring Range - X from 300 mm to 400 mm, Y 200 mm - Z 200 mm
- MPE (Maximum Permissible length measurement Error) - down to 1.5µm
- Foot Print - Depth: 1000 mm, Width: 1600 mm, Height: 1800 mm
IndustryAutomotive, Medical StentCheck Demo Video, Aerospace, Plastics-Moulding, Electronics EnvironmentShop Floor, Gauge and Quality Laboratory
Make An Enquiry
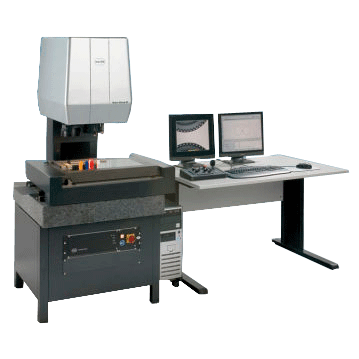 VideoCheck SThis series of Video CMMs is ideal for small measurement ranges that require high accuracy. The Werth constant-stress guideway principle of the X-Y stage ensures high precision and long-term stability. VideoCheck S machines use the Werth image processing sensor with telecentric Werth Zoom and MultiRing. They can be equipped with a wide selection of additional optical and tactile sensors, including the patented Werth Fiber Probe. Measurement ranges are 400 mm x 200 mm and 250 mm x 125 mm in X and Y with 250 mm in Z. Highly flexible and accurate see Video Highlights- Ideal for small measurement ranges that require high accuracy
- The Werth constant-stress guideway principle of the X-Y stage ensures high precision and long-term stability
- VideoCheck ® S machines use the Werth image processing sensor with telecentric WerthZoom® and Werth MultiRing®
- Integration of additional sensors and beampath to a multisensory system guarantees higher flexibility and measurement speed
- Machine can be equipped with a wide selection of additional optical and tactile sensors, including the Werth Fibre Probe
- High Definition Raster Scanning see Video
Machine Specs- Measuring Range : X from 250 mm to 400 mm, Y from 125 mm to 200 mm , Z 200 mm
- MPE (Maximum permissible length measurement error) : down to 1.1µm
- Foot Print : Depth 1000 mm, Width: 1600 mm, Height: 1900 mm
IndustryAutomotive, Medical, Aerospace, Plastics-Moulding, Electronics EnvironmentShop Floor, Gauge and Quality Laboratory Make An Enquiry VideoCheck UAIf the maximum possible precision is demanded in the measurement Lab, then this ultra-precise coodinate measuring machine is the solution. VideoCheck series, resolution in the nanometer range and a special design that reduces measurement errors, are the basis for this device. The standard measurement range is 400 x 400 x 250 mm. Larger measurement ranges are available on request. Range of multisensors are available. Make An Enquiry ScopeCheck FB DZ(Fixed Bridge Dual Z axis columns) See Video The Multi-Sensor Coordinate Measuring Machine for economical production control. As with all Werth ScopeCheck® coordinate measuring machines, the image processing sensor is part of the standard equipment of the ScopeCheck® FB. Werth image processing is specifically tailored to the requirements of dimensional metrology and provides reliable edge detection, even under the most difficult contrast conditions. Additional sensors, such as scanning touch probes, laser distance sensors, Werth Fiber Probes, or rotary/tilting axes increase the flexibility of the system and enable optimal machine configurations for various measurement tasks. Design 3D-CNC fixed bridge multi-sensor CMM for use on the shop floor and in the gauge lab. Available Measuring Sensors Werth image processing (IP) video sensor, Werth 3D-Patch, Werth Laser sensor, touch trigger and dynamic scanning probes, Werth Fiber probe, Werth Contour probe, etc. Measuring Range X = 400 (530) mm-1500 (1630) mm; Y=500-1000mm; Z=350mm Maximum permissible length measurement error down to 1.5 µm Applications Plastic connectors and housings, stamped/bent parts, rotary parts, printed circuit boards (PCBs) watch plates, etc. Solid construction with a fixed bridge guarantees very low measurement uncertainty. The machines are specified comparable to ISO 10360 for both “good” and “normal” measurement lab conditions, as well as for use without air conditioning. Temperature compensation is included as a standard feature. As with all Werth ScopeCheck® coordinate measuring machines, the image processing sensor is part of the standard equipment of the ScopeCheck® FB. Werth image processing is specifically tailored to the requirements of dimensional metrology and provides reliable edge detection, even under the most difficult contrast conditions. Additional sensors, such as scanning touch probes, laser distance sensors, Werth Fiber Probes, or rotary/tilting axes increase the flexibility of the system and enable optimal machine configurations for various measurement tasks. The graphical, interactive WinWerth® measurement software allows dimensions to be easily determined. This makes it possible for even untrained personnel to use the machines. Of course, optical and tactile scanning and CAD-based measurement are also fully integrated. Based on the modular design principle, the machine can be easily upgraded for future applications MultiSensor SC and VC-VerticalFor measuring shafts with tricky features and tight tolerances. The ScopeCheck V (Vertical) is not just an optical shaft scanning machine but a multisensor coordinate measuring machine offering optical, tactile and laser probes for precisely measuring round workpieces, such as tools, shafts and gear shafts in production environments. The special feature of these machines is the integrated vertical rotary axis for rapid measurement of diameters, planes, holes, and cutting and clearance angles with optical, laser and tactile sensors.
Imagine optically scanning the shaft and then measuring the gear form and reporting into the Werth gear measurement software all on one machine - just one of many possibilities.
VIDEO of VideoCheck V (Shafts) Highlights- Precise measurement of cylindrical workpieces (tools, shafts etc.) using application-specific sensors in a production environment
- Heavy duty granite base with CNC air bearing rotary axis
- Integrated vertical rotary axis for rapid measurement of diameters, planes, holes, and cutting and clearance angles with optical and tactile sensors
- All industry standard tool holders and chuck systems are available on the rotary axis
- Unique design allows easy integration of additional sensors for increased flexibility
- Protected enclosure for measurement on the production floor
All industry standard tool holders and chuck systems are available on the rotary axis. Tools can be measured automatically using Numroto interfaces. The graphically supported tool measurement programs Micromills and Microform and the esco software for hobs, taps and form cutters, support simple operation with parametric programming. Standard measurement ranges are:
Length 200 mm x Diameter 140 mm
Length 500 mm x Diameter 250 mm
Length 800 mm x Diameter 250 mm
Larger measurement ranges can be quoted on request. Press Release
Data Sheet
Make An Enquiry  TomoScope XS and XS plusSee through your components and take accurate measurements in 3D. Also ideal for assembled components with multiple materials e.g. connectors, plastic mouldings etc.
X-ray Coordinate Measuring Machine CMM for three-dimensional measurement according to the principle of computed tomography
X-ray CT Reduces first article Inspection time from a few days using classical metrology to a few minutes. With extensive and precise information about the workpiece, tool corrections can be implemented in a fraction of the time. Download informative brochure on TomoScope CT CMMs or See Video - Fast measurement with high resolution via transmission tube
- Low operating costs as a result of the new monoblock design
- Extremely precise air bearing rotary axis for low measurement uncertainty
- Low space requirement thanks to compact design
- As a result of the low weight installation is possible almost anywhere
- Fast amortization through low acquisition costs
- Standard compliant calibration for reliable and traceable measurement results, optionally with DAkkS certificate
- Versatile fields of application such as plastic workpieces with a high glass fiber content and metal components
- Software for 3D real-time reconstruc- tion of workpiece geometries during tomography
- Options:
- Future-proof concept by means of simply upgrading x-ray voltage and power to 160 kV and 80 W respectively at the installation site
- Can be used for more dense materials and longer penetration lengths by upgrading to 160 kV X-ray voltage
- Raster tomography (patent pending)
- – Measurement of small features, even on large workpieces, with high resolution
- – Measuring range extended
- Multi-ROI tomography for high resolution measurement of small object details at any position in the measurement volume in the same
- reference system (patent)
- Volume cross section tomography for the evaluation of any sections in the voxel volume (patent pending)
- OnTheFly tomography for consider-able reduction of the measurement time (patent pending)
- Werth tool correction (patent) for direct correction of injection molding tools
General - Machine type: coordinate measuring machine with CT device
- Probing systems: compact X-ray sensor
- Modes of operation: linear path control
- Measuring software: WinWerth®
- Operating system: MS Windows
- Measuring Ranges: Max. part dimensions for tomography*** – For “in the image“ measurements:
- from L = 49 mm (1.9“), Ø = 55 mm (2.2“) to L = 97 mm (3.8“), Ø = 120 mm (4.7“)
- Workpiece weight: 10 kg (22 Ibs.) - For specified Error MPE: 2 kg (4.4 Ibs.)
- Maximum Permissible Error MPE* For advanced laboratory conditions CT Sensor for1):
- P: 6,5 µm E: (6.5+L/75) µm SD3): (5.5+L/100) µm
- No air conditioning required
- CT Sensor for2) P: 9,5 µm E: (9.5+L/75) µm SD3): (5.5+L/100) µm
- (Where L = measuring length in mm comparable to ISO 10360 and VDI/VDE 2617)
- Additional Performance Data:
- Resolution rotary axis: 0,36“
- Resolution: 0.1 µm (0.000004“)
- Positioning speed: vmax = 150 mm/s
- Acceleration: amax = 300 mm/s2
Larger sizes of TomoScope avialable
TomoScope®– Coordinate Measuring Technology with X-Ray Tomography
Since Werth combined for the first time X-ray computed tomography with proven coordinate measuring technology the machines in the Werth TomoScope® series allow workpieces to be measured completely, precisely and non-destructively. These machines can also be equipped with multisensor systems as an option. With this technology, product development costs are reduced by minimizing time for first article inspection and process validation.
With the TomoScope® XS, the new machine uniquely combines many advantages of various machine classes. The transmission tube – with a unique monoblock design – produces a small focal spot even at high X-ray power, so that rapid measurements can be performed at high resolution. The new X-ray source combines the advantages of closed and open micro-focus X-ray tubes. The monoblock design combines the source, voltage generator and vacuum pump into a single serviceable unit.
Make An Enquiry Multisensor Systems – Optical and Tactile Sensors for Any TaskWerth multisensor coordinate measuring machines can be equipped with a large selection of sensors to provide the right machine configuration for your applications. 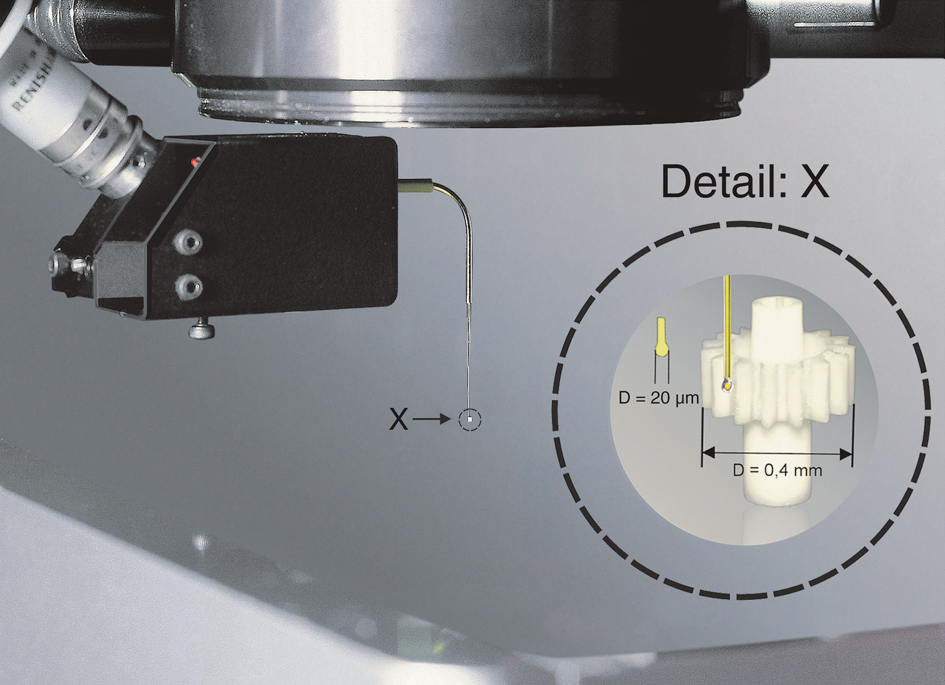 Optical SensorsWerth Image ProcessingThe Werth image processing sensor provides fully automatic measurement of complicated, extremely low contrast work pieces in transmitted and incident light illumination. True contour processing simplifies the recording of complete, enclosed contour parts. Special filtering methods for grayscale image processing, such as contour and image filters reduce the influence of different states of machining, or of dirt particles, on the measurement results. They also have functions for increasing contrast. A light controller ensures that illumination intensity is automatically adapted to changes in surfaces and colors. Measurements in the Z axis are taken by the image processing sensor by focus variation, either by surface measurements as a point cloud (3D patch) or as a single point. Werth ZoomThe unique Werth Zoom optics, with variable working distance, and the patented MultiRing with adjustable lighting angles provide advanced capabilities for automatic measurement even for workpieces with minimal contrast. Werth 3D-PatchWith focus variation methods, surface topographies can be captured simply and quickly in three dimensions. High dynamic range (HDR) principle allows this technology to work even on heterogeneous surfaces with severe variations in brightness. Werth Laser Probe WLPThe unique Foucault principle of the Werth Laser Probe can be used in applications that go far beyond the limits of typical through the lens lasers (TTL). The WLP is especially suitable for the fast measurement of planes as well as for the highly accurate measurement of freeform surfaces that are cambered up to 80°. Because of the vertical beam path, the measurement of the smallest features is also possible. Laser Line Probe LLPLarge, free-form surfaces with tolerances in the middle precision range can be measured quickly with large data sets and high point densities. Werth Nano Focus Probe NFPThe NFP measures topography and roughness of surfaces with the principle of confocal microscopy. Even cutting edge radii on tools or layer thicknesses can be measured. Werth Chromatic Focus Probe CFPThe operating principle of the Werth Chromatic Focus Probe (CFP) provides scanning capability on highly reflective and transparent surfaces. Different sensor heads for different applications can be selected. Werth Interferometer Probe WIPThe WIP is a non-contacting fiber optic distance sensor for high-precision measurement of geometry, form and roughness. Features are measured using a very thin glass fiber probe with an interferometric analysis of the distance between probe and workpiece. Optical Measuring Heads – Werth IP 40 T and Werth IP 110 TThe rotating and tilting IP 40 T and IP 110 T sensors make flexible measurement with image processing possible at any angle. Large workpieces and difficult to access features can be measured. The Werth Fiber Probe can also be used with this versatile optical sensor. Tactile SensorsWerth Contour Probe WCPApplications that previously used a stylus or contour tracer can be done for the first time during the CMM operation using the patented Werth Contour Probe. This tactile probe allows surface finish or form / contour to be measured in defined workpiece coordinates, in any direction during one measurement and can analyse micro and macro forms. Measurements in additional orientations are not necessary. Werth Fiber Probe WFP (The Most Successful Microprobe in the World)The patented Werth Fiber Probe (WFP) with probe sphere radii down to 10 µm allows 2D and 3D measurements of extremely small geometries with previously unobtainable precision. Contact forces in the micro newton range allow even sensitive features to be measured without deformation and surface damage. The fiber probe is available in many variations to fit each application whether fre from scanning e.g. Implants or very small parts e.g. Watch Parts / Fuel Injectors. More Tactile probing systemsRenishaw probing systems, such as TP200, SP25, SP600 and SP80, are fully integrated in Werth coordinate measuring machines. A wide selection of parking stations, as well as rotary and rotary/tilt heads, increase the flexibility and allow the machines to be configured to match the application. Multisensor Probe Werth WMS Magnetic InterfaceThe universal Werth magnetic interface can be used to swap out various sensors fully automatically with a suitable parking station. This makes it possible to measure using the Werth Zoom, 3D-Patch, Werth Laser Probe, mechanical probe systems, WFP, angular optics, and the WCP in one measurement sequence, not only on one single machine, but even at the same sensor position without any loss of measurement range. Werth WFP/S: The Most Successful Microprobe in the World – Now in Freeform Scanning ModeThe Werth Fiber Probe, with multiple patents, has been used exclusively with Werth coordinate measuring machines for many years. Due to its outstanding properties, such as maximum precision paired with very small probe sphere diameters, it has been proven many times over in the marketplace. With several hundred installations, it is by far the most successful microprobe in the world. With modern signal processing and 64-bit control technology, a freeform scanning mode is now possible without the use of predefined contours. The user simply selects the start and end points for the scan path and the sensor follows the unknown contour automatically.
Software integration is completely analogous to the functions of conventional measuring probes. This makes it easier for the user to operate. With negligible contact force in the µN range, the Fiber Probe ensures that work pieces will not be damaged, even when scanning freeform contours. The probe shank length, probe electronics, sensor offset and sensor drift have negligible effects on the measurement results. Another advantage is simple operation while observing the probe sphere with the camera.
The versatile WFP/S can be used in medical technology (implants), the watch industry (miniature gears) and automotive technology (fuel injection systems). Download The Multisensor CMM Brochure
Make An Enquiry Industry applications pfdsProsthetic Joints,Screws and Nails,Implants, Inhalers, Dental |