Tomelleri Portable Measuring Arms - High accuracy, High end, Hand built - a great portable CMMHigh accuracy measuring arms and great value from Tomelleri, high end, hand built portable measuring arms. Accurately measure parts on the machine, at your customer, in the factory or on site with confidence in your reports. Measure geometric features or touch scan complex forms. Check out new MICRON arm. Selected used measuring arms available please Make Enquiry
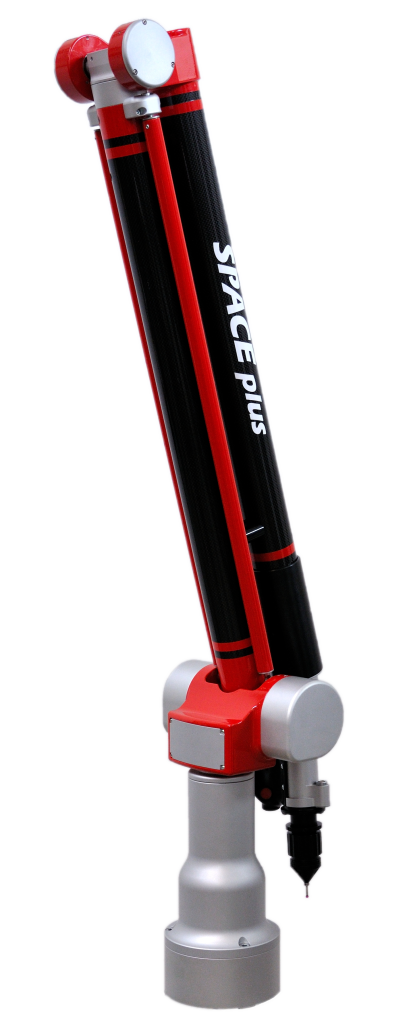 Space and Space Plus Measuring Arms1.8M to 4M, light weight, ergonomic, counter balanced portable measuring arms 6 and 7 axis, good accuracy. Choice of probes includes
U fork for Pipe measurement.
Mercury Highest Accuracy Arm1.3M and 1.8M highest accuracy, light weight, ergonomic, counter balanced portable measuring arms 6 and 7 axis.
1300mm: 0,005 + L\50 < 0,015 mm
1800mm: 0,005 + L\40 < 0,018 mm
Explorer Large Measurement Arm
5.0M, 7.0M up to 9.0M.When you need to measure a large volume. Incredible accuracy for volume. Electromagnetic lock on 2nd axis for ergonomic use at a chosen locked height.
Aberlink Software Powerful/Easy to useGreat software with 3D geometric measurement, CAD comparison (option) comprehensive reporting and CAD output as standard, great for reverse engineering. Retrofits.
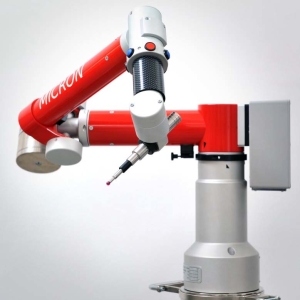
MICRON
High Precision Measurement Arm
MICRON is a new concept portable articulated arm CMM, designed to get the best accuracy performance with the best part access thanks to its unique 5 axes design.
Micron 250x250x200 4µ + L/50
Micron 400x250x250 5µ + L/50 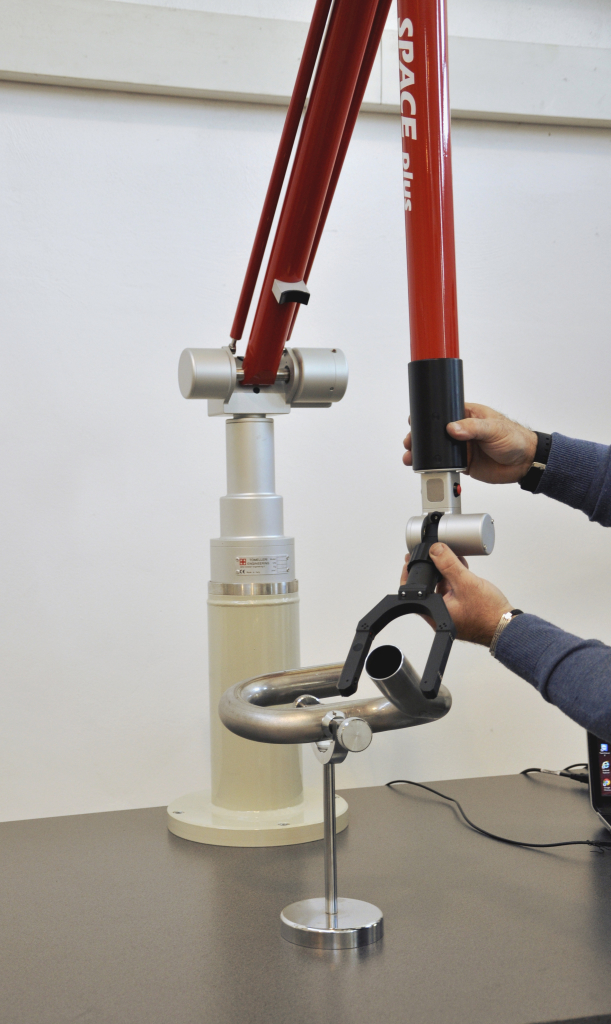
SPACE Tubo
Pipe inspection The perfect equipment for pipe inspection with laser fork and dedicated software.
1800mm: 0,056 Vol Acc Laser Fork
2500mm: 0,063 Vol Acc Laser Fork
3200mm: 0,072 Vol Acc Laser Fork
4000mm: 0,099 Vol Acc Laser Fork Carefully Selected Used Measurement Arms Please EnquireWe have a selection of used measuring arms including two Faro Gage arms in excellent condition with the powerful, easy to use Aberlink software.
Make Enquiry Arm AccessoriesTripods, Magnetic Base, Vacuum Base, Hard Probes, Touch Trigger Probe, Floating Probe, Laser Scanners, Portable Work Bench
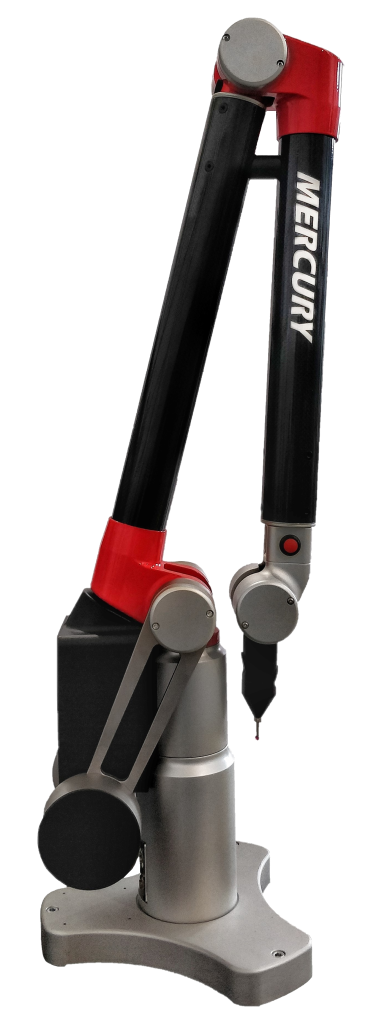
MERCURY – The Highest Accuracy Made Easy
MERCURY Arm is the result of over thirty years of experience in the manufacturing of high-end Articulated Arm. Further improved by new hardware and software solutions, this arm reaches a level of accuracy never seen before. ENQUIRE PERFECT BALANCE The MERCURY Arm is characterized by a completely new handling solution with an optimized mass counterbalance, making the arm very light in the hands and ensuring an immediate confidence. HOME POSITION IN FRONT Thanks to the innovative counterbalance, the MERCURY Arm has a safe home position directly in front of the operator. To take the arm and to put it back has never been so quick and easy. READY TO OPERATE The MERCURY Arm is designed to obtain the best performances with the best handling conditions. The arm can be placed directly on the supporting surface without fixation, or on a tripod, as preferred. LARGE SOFTWARE SELECTION The MERCURY Arm keeps the compatibility with the main inspection software available. SPECIFICATIONS | Model | Point Repeatability | Volumetric Accuracy | MPEp | MPEe | | MERCURY 1300 | 0,010 mm | 0,020 mm | 0,008 mm | 0,005 + L\50 < 0,015 mm | | MERCURY 1800 | 0,012 mm | 0,024 mm | 0,008 mm | 0,005 + L\40 < 0,018 mm |
- Any value in this table is reported as Maximum Permissible Error
- MPEp: i s the Maximum Permissible Probing Error according to the ISO 10360-2 standard
- MPEe: is the Volumetric Length Measuring Error according to the ISO 10360-2 standard
DIMENSIONS 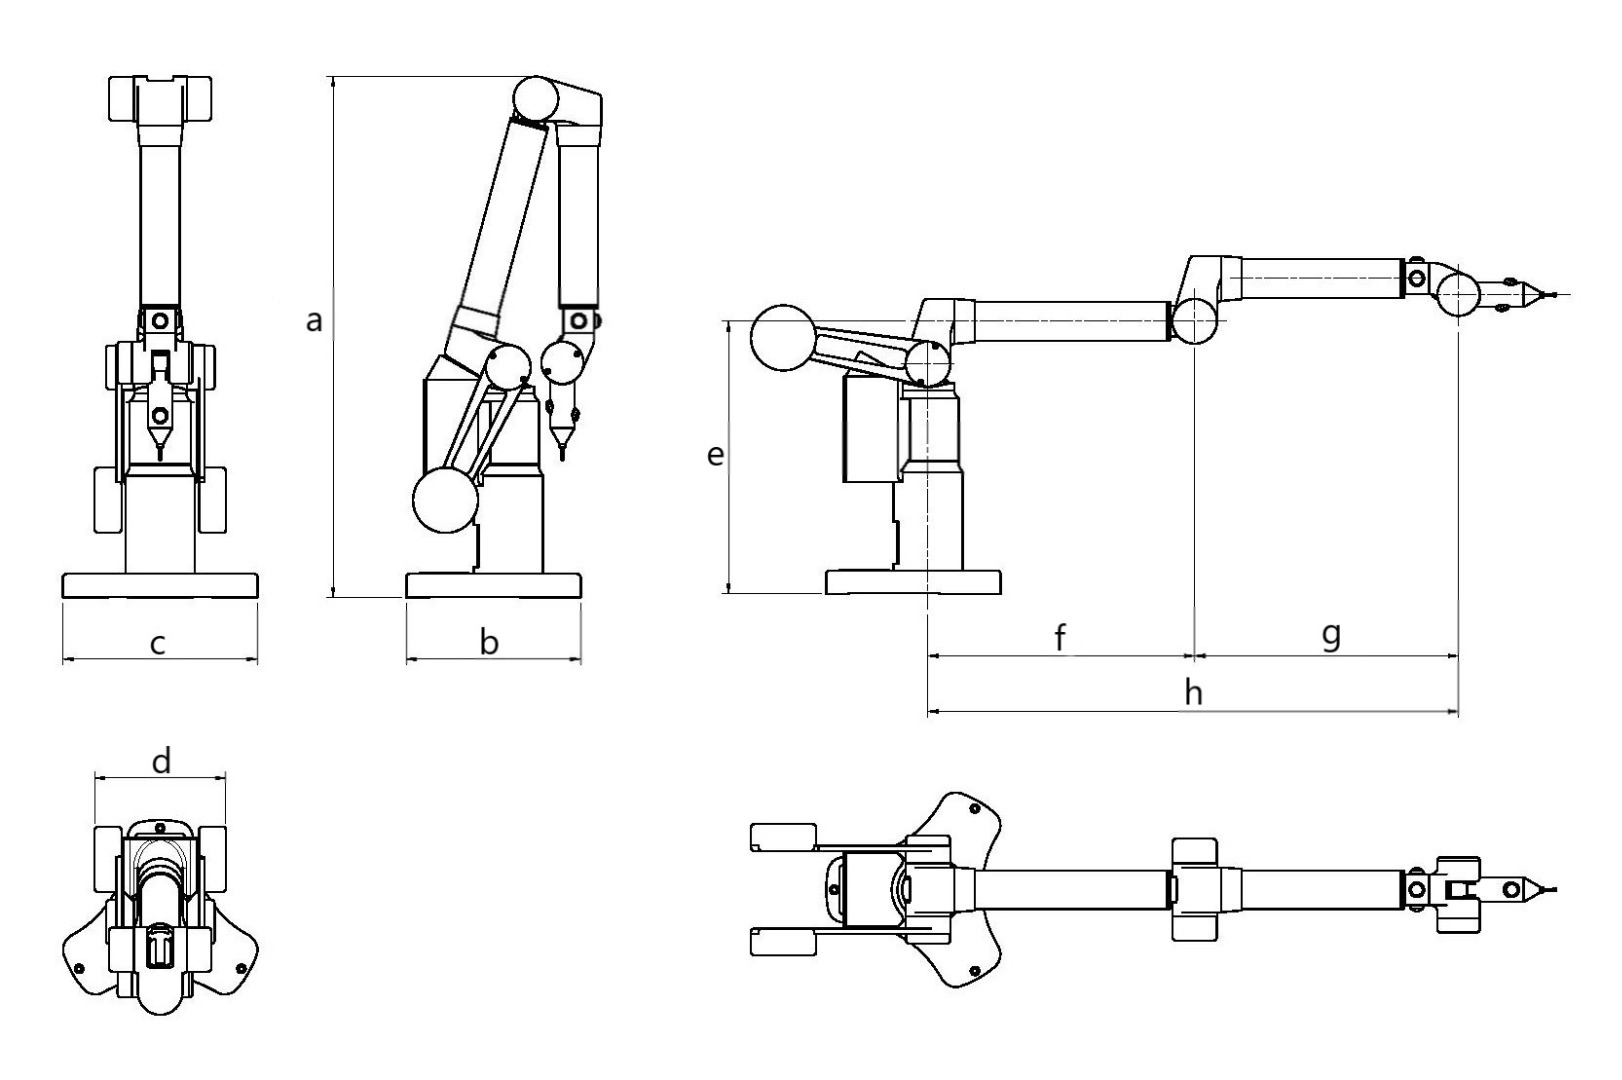 | | | DIMENSIONS (mm) | WEIGHTS (kg) | | Model | | a | b | c | d | e | f | g | h | | | | | | | | | | | | | MERCURY 1300 | 639 | 214 | 239 | 161 | 334 | 327 | 323 | 650 | 9.5 | | MERCURY 1800 | 760 | 214 | 239 | 175 | 334 | 452 | 448 | 900 | 10.4 |
TECHNICAL DATA | POWER SUPPLY | 100-240V / 50-60 Hz | | PROTECTION | IP 54 | | OPERATING CONDITIONS | +10° – +40° ; Humidity 90% without condensing | | CONFORMITY | In compliance with CE |

SPACE Plus and SPACE – Measurement Arms
The SPACE Plus and the SPACE are two portable articulated arms CMM, ideal for quick and accurate inspection of any parts within its range. They are the result of nearly 30 years of experience in production of portable measurement arms, culminating in this renewed version. Now we have better accuracy and repeatability and also a new design nice to see. ENQUIRE The SPACE line arms are now lighter and this make it easier to handle the arm during measuring. The counter-balance system with a double spring also gives the machine characteristics of precision light-weight and easy handling. Our new arm is the top of reliability, accuracy, and flexibility in use. The SPACE Plus arm can be used also in combination with Laser Scanners for point cloud inspection or reverse-engineering, in 7 axis configuration. This version has some unique features like the magnetic brake , which prevent accidental fall of the arm and improved electronics for better performance. It’s the perfect equipment for touch or laser inspection and reverse-engineering and is suitable also for pipe inspection with laser fork and dedicated software. Our SPACE Plus arms are available in several sizes: from 1.8m to 4.0m diameter range and in 6 or 7 axis configuration. | SPACE Plus | Measuring
range | Volumetric
accuracy* | Point
Repeatability* | Weight
(Kg) |
|---|
| SPACE PLUS series (6 and 7 axes arm) – all values in mm – *=2 sigma error (mm) | | SPACE 1.8 Plus -6 axes | 1800mm | 0,020 | 0,012 | 8,4 | | SPACE 2.5 Plus -6 axes | 2500mm | 0,026 | 0,016 | 8,9 | | SPACE 3.2 Plus -6 axes | 3200mm | 0,036 | 0,020 | 9,3 | | SPACE 4.0 Plus -6 axes | 4000mm | 0,046 | 0,024 | 10,0 | | SPACE 1.8 Plus -7 axes | 1800mm | 0,027 | 0,017 | 8,9 | | SPACE 2.5 Plus -7 axes | 2500mm | 0,034 | 0,021 | 9,4 | | SPACE 3.2 Plus -7 axes | 3200mm | 0,045 | 0,026 | 9,8 | | SPACE 4.0 Plus -7 axes | 4000mm | 0,056 | 0,030 | 10,5 |
The
SPACE
arm is the entry-level version of
SPACE Plus
arm with light electronics, available only in 6 axes configuration and without the electromagnetic brake.
Touch trigger probe, “floating” probe and laser forks can be quickly interchanged thanks to a highprecision mount.
It’s suitable also for pipe inspection with laser fork and dedicated software.
Our
SPACE
arms are available in several size: from 1.8m to 4.0m diameter range and in 6 configuration.
|
SPACE
|
Measuring
range
|
Volumetric
accuracy*
|
Point
Repeatability*
|
Weight
(Kg)
|
|
SPACE series (6 axes arm) – all values in mm – *=2 sigma error (mm)
|
|
SPACE 1.8
|
1800mm
|
0,025
|
0,018
|
7,9
|
|
SPACE 2.5
|
2500mm
|
0,036
|
0,022
|
8,4
|
|
SPACE 3.2
|
3200mm
|
0,045
|
0,032
|
8,8
|
|
SPACE 4.0
|
4000mm
|
0,060
|
0,040
|
9,5
|
The high repeatability probe mount
, ensure an easy and reliable use of the arm, switching from one probe configuration to another, having the system automatically recognizing the type and the parameters of the probe in use.

SPACE Tubo – the Pipe inspection solution SPACE Tubo it’s the perfect equipment for pipe inspection with laser fork and dedicated software. It’s based on the SPACE arm design, is a portable articulated arm CMM ideal for quick and accurate inspection of pipes and any other parts within its range. The result of more than 25 years of experience in production of portable measurement arms. ENQUIRE SPACE Tubo is available in several size: from 1.8m to 5.0m diameter range, and in 6 or 7 axis configuration. The counter-balance system with a double spring also gives the machine characteristics of precision light-weight and easy handling. It’s the top of reliability, accuracy, and flexibility in use. Touch trigger probe, “floating” probe, laser scanners and laser forks can be quickly interchanged thanks to a highprecision mount. It has some unique features like the magnetic brake, or the smart the sensitive “floating” probe. | SPACE Tubo | Measuring
range | Volumetric
accuracy
with Laser
Fork* | Probe
point
accuracy* | Point
Repeatability* | Weight
(Kg) |
|---|
| SPACE Tubo (6 axes arms) – all values in mm – *=2 sigma error | | SPACE 1.8 Tubo | 1800 | 0,056 | 0,025 | 0,020 | 7,9 | | SPACE 2.5 Tubo | 2500 | 0,063 | 0,036 | 0,028 | 8,4 | | SPACE 3.2 Tubo | 3200 | 0,072 | 0,045 | 0,035 | 8,8 | | SPACE 4.0 Tubo | 4000 | 0,099 | 0,060 | 0,045 | 9,5 |
ACCESSORIES and SOFTWARE Software TomelleriTUBO R.7 performance list Measurement by laser fork or probe: - of straight tubes
- of bent tubes measuring just the straight lengths
- of bends (survey the bending radius)
- of consecutive bends (absence of straight length between one bend and the other one, also called bend-to-bend)
- of scaled tube
- of secondary tubes welded to the main tube
- of RCV (variable radius bend) tubes
- of tubes having non circular section (profiles)
Possibility to change tube diameter during the measuring procedure Comparison and correction: - Comparison and correction (classic mode) linked to the CNC
- Spring-back correction (20 –120)
- Alignment: possibility to obtain the data of the measured tube regarding (aligned) a master tube that is already in memory, to an external reference or to a drawing (manual and automatic procedure).
- Creation of material archive for the spring-back compensation to apply to the bending program.
Archive: - Creation of Tubes and Masters archives
- Automatic research in archive
- Creation, modification and printing of models in:
- Cartesian coordinates
- Polar coordinates
- Double Cartesian coordinates
- Calendering both in setting and in acquiring
Data Transmission: - Export via ethernet, via serial line RS232
Electronic Gauge: - Graphic representation of the measured tube
- Graphic overlap of a tube on its master (flanges/holes/small pipes included)
- Manual and automatic positioning of the tube inside the Gauge
- Data regarding the axial and radial shifting of:
- Beginning point of a tract
- Middle point of a tract
- Ending point of a tract
- Middle point of a curve (this for each program = tract + curve)
- Flanges, holes, small pipes
- Setup of Gauge’s tolerances for each of the above mentioned points with graphic visualisation of the stated tolerances
- Rotation, shifting, and dynamic zoom
- Printing of the graph and of the obtained data
- RCV Tubes:
- Measurement of tubes having non constant bending radius and variable rotation along the bend without straight lengths.
- Measurement RCV mixed with parts having variable bending radius and parts having constant bending radius
- Setting of RCV and RCV mixed tubes from file
- Automatic correction of the bending program for RCV and RCV mixed tubes
- Measurement of tubes having non circular section (profiles)
- Automatic correction of the bending program
LASER FORK Ideal accessory for the rapid measurement without direct contact with the pipe. 5 forks size are available (mm):
30, 50, 80, 150, 200 The smaller forks feature with a laser pointer to spot small pipes during the measure.
Pipes from 2mm to 180mm of diameter can be measured with the use of laser forks, larger diameters can be measured with the touch probe. TOUCH TRIGGER (electronic) PROBE The touch trigger probe allow to acquire points applying the minimum force on the measured part. Is a very precise, quick and comfortable in use, acquires points only touching the surface, without triggering buttons.
Available with many different stylus length and sphere diameters.
Touch trigger probe head offered is produced by Renishaw, model LP2 All the available probes fits the same mechanical mount of the standard SPACE version and are interchangeable. The precision mount is extremely repeatable and allow to switch from one probe to another without recalibration . MOBILE TRIPOD Stable and practical, is the ideal accessory to move easily and quickly the SPACE arm.
The leaflet at the base allows you to quickly switch the from measurement position to mobile position, and vice versa in a gradual way without shocks.
The tripod is adjustable in height and the weight of the tripod column is balanced by a gas spring, and a side handle allows for vertical and horizontal movement of the tripod.
The removable lateral shelf allows positioning of the laptop next to the measuring arm. TABLE Perfect and unique accessory for this type of arm.
The portable arm unit can be placed on the top of the table with a support or just directly on the rigid laminate top surface.
Tube supports can hold the part in a correct position to allow the inspection with great comfort of use.
Simply creating your inspection zone, beside the pipe bending machine or just in a dedicated area of your workshop.
Available for every size of SPACE TUBO arm.
EXPLORER – Measurement Arm
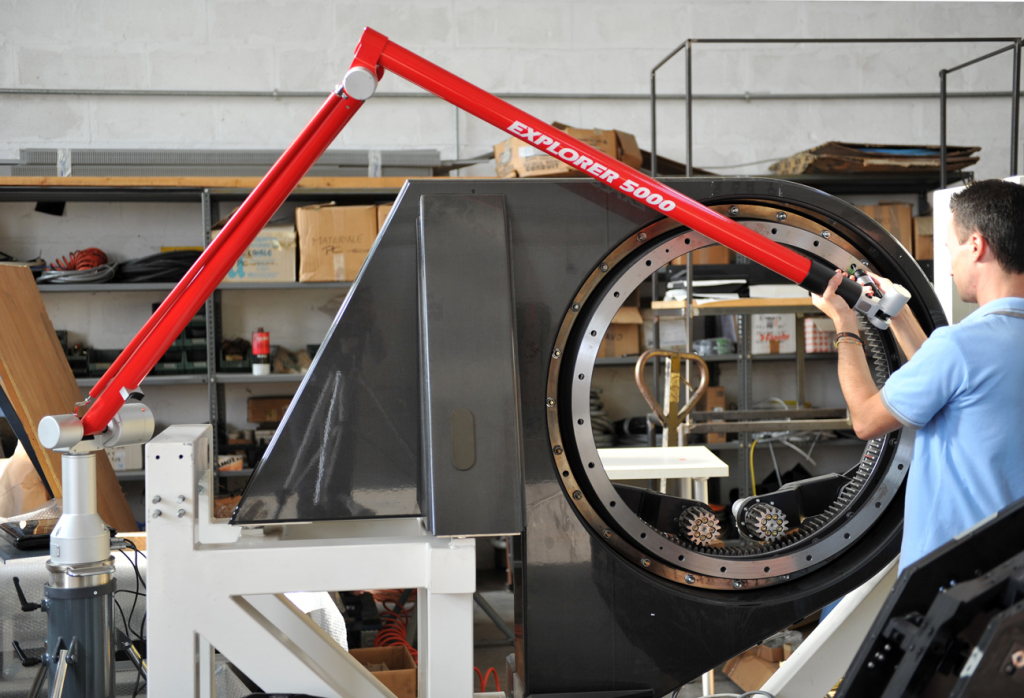
EXPLORER when you need to measure a large volume! The unique portable arm available in the worldwide market with a measuring range of 5.0m, 7.0m up to 9.0m! ENQUIRE The result of a great experience in large volume metrology of TOMELLERI ENGINEERING S.r.L. This is the product you need when other equipment cannot reach that large size with such incredible accuracy performance. It’s the perfect equipment for touch probe inspection of large parts, where you need to “explore” big parts with great flexibility. When your part to inspect is big and heavy, don’t move it, take the EXPLORER arm on it and get your measures done quickly. EXPLORER standard equipped includes electromagnetic brake on the second axis, which allows the operator to lock the second axis at required height and use the arm safely and comfortably. It’s also suitable with Laser Forks for pipe inspection, our all standard accessories line, and Laser Scanners for point cloud inspection or Reverse-engineering. The largest portable measurement up to 9.0m of measuring range, all within incredible accuracy of 0.1mm per point on the measuring volume.
Make Enquiry | SPACE Explorer | Measuring
range | Volumetric
accuracy* | | Point
Repeatability* | Weight
(Kg) |
|---|
SPACE EXPLORER series (6 and 7 axes arm) – all values in mm – *=2 sigma error
| | EXPLORER 5.0 – 6 axes | 5000mm | 0,065 | | 0,038 | 12,5 | | EXPLORER 7.0 – 6 axes | 7000mm | 0,080 | | 0,048 | 14,0 | | EXPLORER 9.0 – 6 axes | 9000mm | 0,150 | | 0,075 | 16,5 | | | EXPLORER 5.0 – 7 axes | 5000mm | 0,075 | | 0,050 | 13,5 | | EXPLORER 7.0 – 7 axes | 7000mm | 0,090 | | 0,060 | 15,0 | | EXPLORER 9.0 – 7 axes | 9000mm | 0,170 | | 0,090 | 17,5 |
|
|---|

MICRON – High Precision Measurement Arm
MICRON is a new concept portable articulated arm CMM, designed to get the best accuracy performance with the best part access thanks to its unique 5 axes design.
It’s a portable CMM dedicated for precise part inspection, in quality control or any other process where a touch probe control is necessary. ENQUIRE MICRON is an arm light-weight and easy handling, the counter-balance makes the movement of the axis extremely smooth. The operator holds the probe and guide the arm supporting only 15grams weight.
It’s the perfect equipment for touch probe inspection when easy of use and high precision is necessary quickly and within a hand’s reach. The particular design of the arms allows access to the measurement of the workpiece around its outline, like no other CMMs can do! The MICRON arms are designed to be fixed on a tripod with wheels that is adjustable in height and has a shelf that enables measurement of the part within, for example, the machine tool. They can be also fixed on other support equipment, including granite table. MICRON arms have also an automatic temperature compensation for the arm and for the measured part. Powerful software, simple and fast to use with great functionality. CAD output as standard (ideal for reverse engineering) and CAD comparison as an option. Enquire Micron Arm Measuring Range mm Accuracy*
Micron 250 250 x 250 x 200 4µ + L/60
Micron 400S 400 x 250 x 250 5µ + L/60
MICRON (5 axes arm) – *according ISO10360/2 | | |
|---|
|
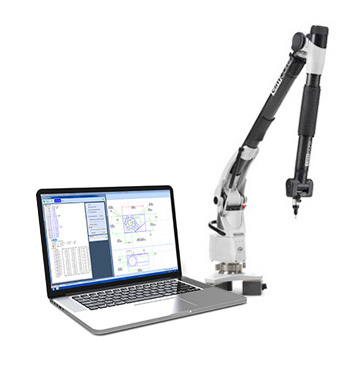 Articulating Portable Measuring Arms Software Powerful software, simple and fast to use with great functionality. CAD output as standard (ideal for reverse engineering) and CAD comparison as an option.
Measuring Arm Software VIDEO
Aberlink 3D manual metrology software can be retrofitted to virtually every make of portable measuring arm on the market offering you great functionality and reporting with simplicity of use. We also offer training courses to get the most out your measuring arm. Uniquely Aberlink measurement software upgrades are free for the life of the machine with no maintenance charges.
Aberlink's revolutionary measurement software provides you with a powerful, yet easy-to-use user interface. This substantially increases component through-put and vastly reduces the learning period of new users.
Watch the Aberlink 3D software video, see how easy it is to use and start to benefit. Free-of-charge Aberlink 3D software upgrades - No software maintenance charges! - Contact us to see just how affordable an Aberlink retrofit would be.
To see the range of portable measuring supplied by Purdue Metrology please click Portable Arms . We sometimes have used arms for sale please Enquire Retrofit Kit - Aberlink 3D measurement software
- Aberlink 3D measurement software user guide
- Installation and on-site verification test
- On-site User training course
- Free-of-charge telephone helpdesk support
- Free-of-charge software upgrades
Arm Kits available for: Faro Arms - Tomelleri Arms and most other manufacturers. See also Portable Work Station for Measuring Arms Make An Enquiry
Hard ProbeThe mechanical probe is the standard touch probe, available with different sphere diameter. Points can be taken touching the part and pushing the button on board the probe body. The smallest usable probe diameter is 1mm to guarantee the point accuracy, the maximum length suggested is 100mm. Touch Trigger ProbeThe touch trigger probe acquire points applying the minimum force on the measured part. Is a very precise, quick and comfortable in use, acquires points only touching the surface, without triggering buttons. Floating ProbeIt is a rigid mechanical probe suspended on a spring driven by an aluminium ring that triggers the probe with a simple touch. The integrated force control avoids to apply uncontrolled load on the part, improving accuracy and repeatability. The control ring is isolated from the probe stylus to avoid thermal impact from the hands of the user. Mobile TripodsStable and practical, the ideal accessory to move easily and quickly. The tripod is adjustable in height and the weight of the tripod column is balanced by a gas spring. Tripods are also available with a shelf. Mobile WorkbenchSturdy and portable. Can be built to suit your requirements. Workstation Magnetic BaseThis magnetic base will allow your machine to produce the highest quality precision. Only a minimum effort required to install it with your machine tool. Vacuum BaseThe vacuum base is ideal for on flat surfaces such as a granite table. Laser ScannerFor a complex-profile contour scanning the new lighter PreciTrack3D ALP laser scanners can be combined with our 7 axis arms. Both Blue and Red laser scanners are available in three width bands 25mm, 50mm and 100mm width.
|